Three Posing Tips Everyone Needs to Follow
- Aaron Taylor
- Apr 12, 2017
- 4 min read
In the excitement (and stress?) of a photography session, it can be tough to relax and think about your posture, especially if you are occupied with little kids or pets. If you're the lone subject of the session, it's also easy to over-think things as you lose yourself in the camera lens. Let's face it, being photographed can take us out of our comfort zone and turn what should be pretty easy (being yourself) into an out-of-body experience.
A good photographer will alleviate stress, keep things comfortable and fun, and give you small posing tips during the session. In my experience, there are three posing tips that I find myself giving over and over, session after session. If you want to look your best for any photo, follow these three tips.

1. Put your weight on your back foot
Don't stand flat-footed with both feet parallel and on an equal plane. Instead, put one foot slightly behind the other, angle your feet slightly out from each other, and lean on that back foot. How do you know if you're doing it right? Your back leg will be straight and your front leg will have a slight bend in it.
Young girls exaggerate this technique on social media. You've seen it: one leg is straight and the other pokes out at the knee, making a triangle. (One hand is usually on a hip, making another triangle.) These girls have the right idea, but the bent leg should be less posed, more natural. What I notice more often than not, though, is that they put the weight on the wrong foot! The leg closest to the camera is straight and the leg farther is bent. It should be the opposite!
Why should the farther leg be straight and the closer be bent? Whatever is closest to the camera is always biggest. When you shift your weight to your back leg, you also shift your hips and waist away from the camera, slimming your figure.
If you're looking for some variety, try crossing your legs like a walking runway model. You should still keep your weight on your back leg, but now you have another pose to play with. Crossing your legs also works well if you're leaning against something, like a wall or tree.
Are you sitting down? Angle yourself slightly and shift your weight to your back thigh. It's the same concept, just sitting instead.

2. Breathe in, straighten your back, and roll back your shoulders
Breathing in will help you relax. It'll also tighten skin around your neck and shoulders, which is always good. Breathing in also tends to help our posture.
When it comes to your back, pretend like there's a string on top of your head and pull it to the sky. Don't over-exaggerate this movement, though. Just make sure your spine from waist to shoulders is straight.
I often notice posture slackening when we've been in the same pose for more the 15 or 20 seconds. If we're still trying to get everyone smiling after some time has passed, ask yourself if your back is still straight. Breathe in and straighten things out.
When you're sitting down, sit on the edge. That will force you to keep a straighter back. Try leaning forward slightly, too. That will bring your face in line with your knees, ensuring that your legs don't look much bigger than your head. Remember, what's closest is biggest. We don't usually want huge feet and knees and a tiny head. Sit on the edge of the seat, lean slightly forward, and breathe in.
Along with straightening your back, rolling your shoulders back will give you better posture, elongating your neck and tightening the skin around your shoulders. Breathe in, straighten your back, and roll back your shoulders. Those three steps will have you looking your best.

3. Touch something with your hands
Hands look best when they're doing something. In family photos, we're often holding our kids, so posing our hands takes less effort. However, here's what you can do if you need a little help with your hands.
First, try putting your hands on your hips or in your pockets. Not only is this better than a straight arm down at your side, but you're also creating a gap between arm and waist. That gap, no matter how small, will slim you down and give you shape. Without that gap, you'll give yourself a blockier shape--it'll just be body and arm lumped together. Create that gap between arm and waist.
Next, try holding a jacket lapel, holding someone else's hand, or touching someone's arm or leg. Be careful with how tight you hold. Keep a relaxed, natural grip. Holding too tight will show stress. Even if you are stressed, fake it by loosening your grip.
If you're looking for some more style, try touching your hair. (This works more for high school seniors or fashion shoots, but it doesn't hurt to try!)
If you're putting your arm around someone, then hide your hand behind their back, not around waist. We don't want to see a mystery hand poking from around someone's body.
Also try touching something physical, like an armrest, a table top, an object (like a purse or book), a tree, or a fence rail. If there's something physical in your scene and it makes sense to touch it, give it a try. Just keep wrists and hands relaxed. Don't grip too tight. If it doesn't feel natural, then it doesn't look natural either.
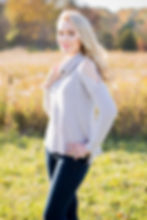
Take a look at the photos I included here. Some of the suggestions are followed, others aren't. What do you see that worked well and what could be improved?
Whether you're a photographer looking to help your models or someone just hoping to look a little better in photos, the three tips here will always help. If you'd like to learn more, Roberto Valenzuela's Picture Perfect Posing is an amazing resource. I highly recommend it.

